Follow the steps below to create your team and build your roster for National League club-based competition in Squadi. Click the title of each part to open up the step-by-step guide.
PART 1: HOW TO LOG IN
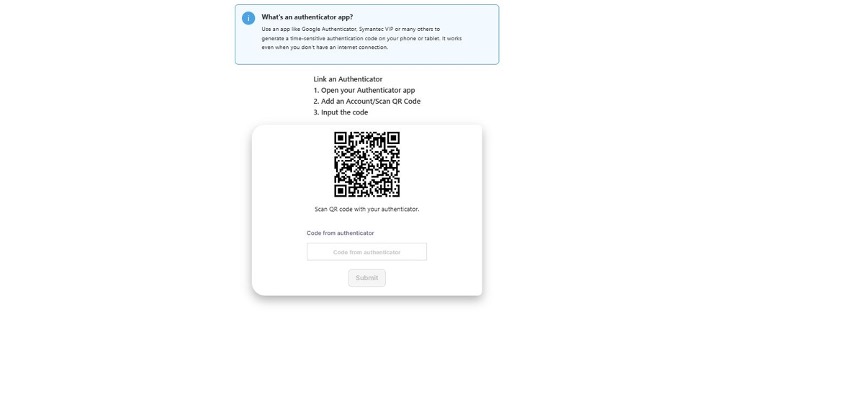
1. Login to your profile via https://admin.us.squadi.com/login and follow the Two-Factor Authentication prompts below (You will need to download an authenticator app if you do not already have one).
PART 2: HOW TO CREATE A TEAM
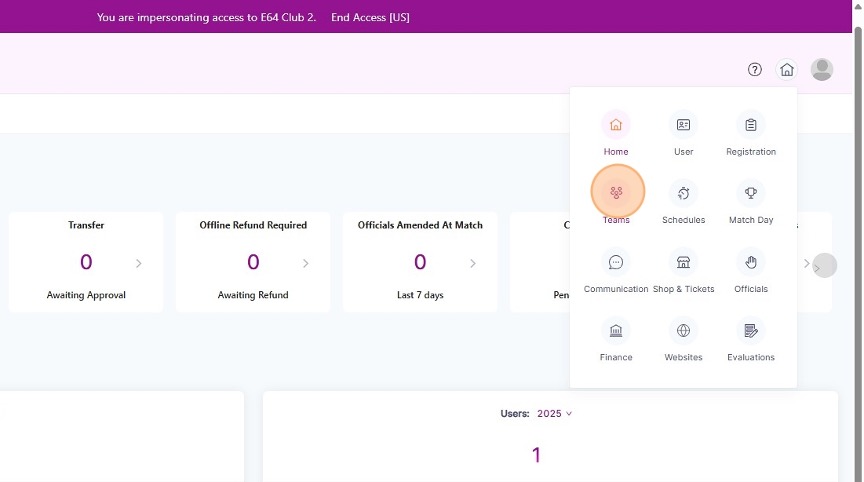
1. Click on the home icon () in the top-right corner of your dashboard, and select the Teams module from the list of options.
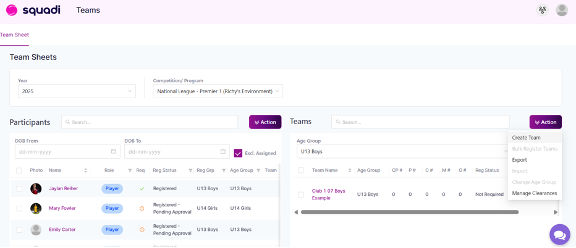
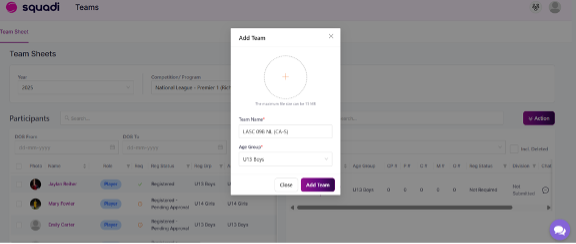
2. Click the action button on the right hand side and select Create Team.
3. Enter in the team name and select the age group. See below for a guide for how to properly name your team.
Team Naming Guide
Team names should follow this format: [Club] [Birth Year(s)] [Gender] [Identifier] [NL] [(State Abbreviation)]
Example: City FC 07/08B Green NL (TX-N)
- Birth years – for single year, use two digits (09); for split years, use “##/##” (07/08)
- Gender – attach a capital letter to the end of the birth year; “B” for boys or “G” for girls
- Identifier – optional, if your club specifies teams by color, nickname, coach name, etc.
- NL – the end of the team name must include “NL”
- State abbreviation – put your two-letter state abbreviation in parentheses after your team name
- (CA-N), (CA-S), (NY-E), (NY-W), (PA-E), (PA-W), (TX-N), (TX-S) for states that have two associations
4. Click the “Add Team” button to finish creating your team.
PART 3: HOW TO ADD YOUR PLAYERS
To add your players, you can either import all players at once using a spreadsheet or you can manually create each individual player directly in Squadi. Both options are outlined below.
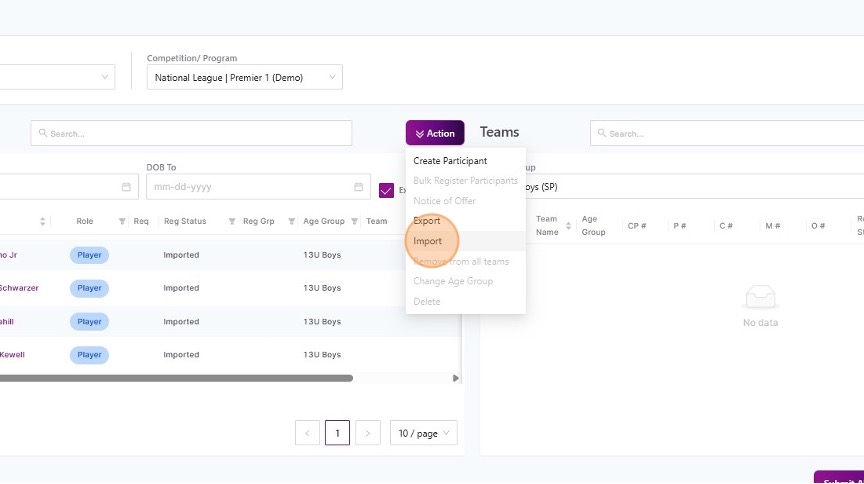
OPTION 1 – IMPORT ALL PLAYERS AT ONCE
To import your players, click the Action option and then select Import. To download and fill out the spreadsheet you must use for the import, click the download button below.
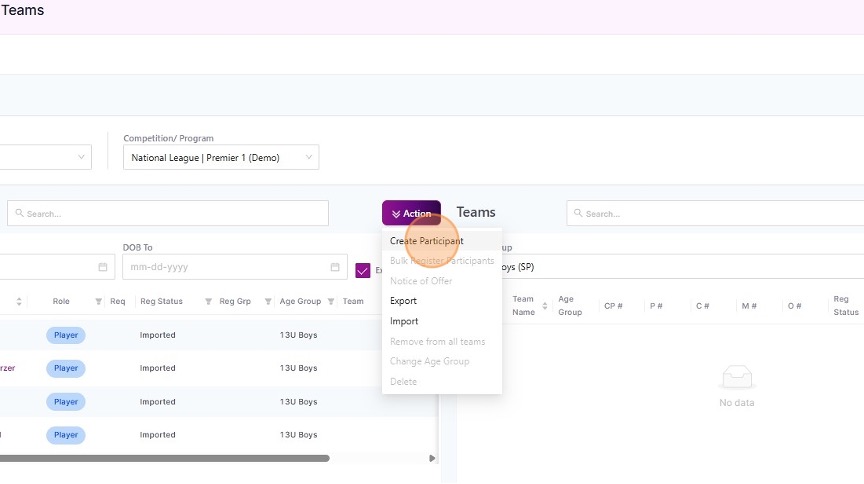
OPTION 2 – MANUALLY CREATE INDIVIDUAL PLAYERS
To manually create individual players, click the Action option and then select Create Participant.
Fill out the participant details. When finished, click Add Participant.
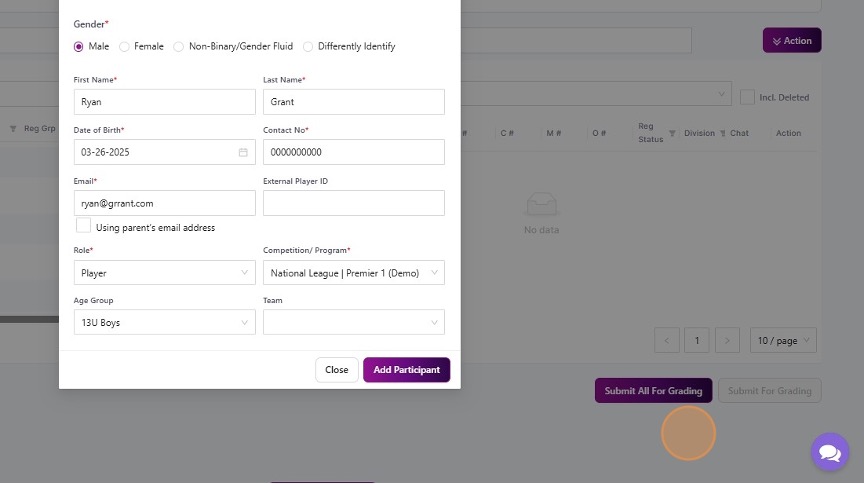
Repeat the above steps to add each player on your team.
PART 4: BULK REGISTER YOUR PARTICIPANTS
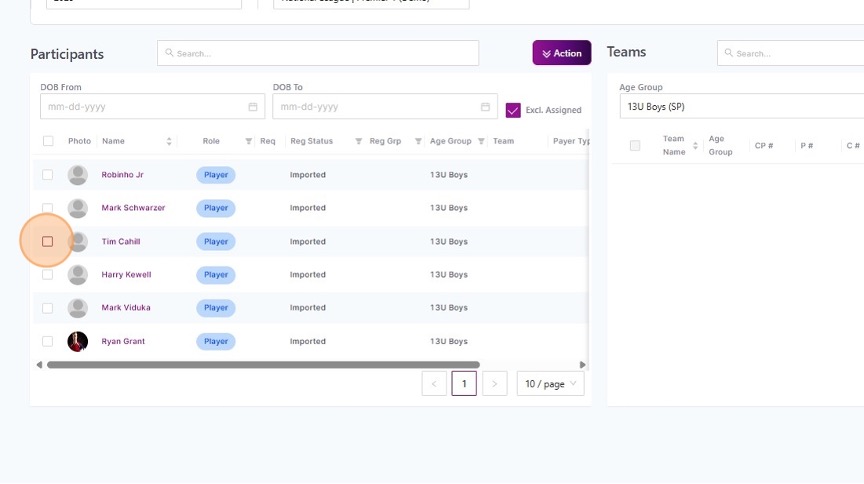
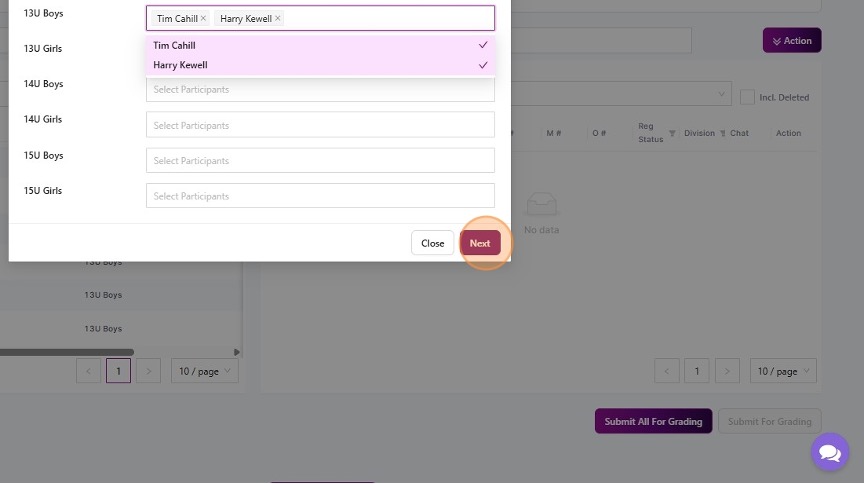
1. Once you have imported your participants, select the checkboxes for the participants you would like to bulk register. Please note: select only players (do not include coaches or managers).
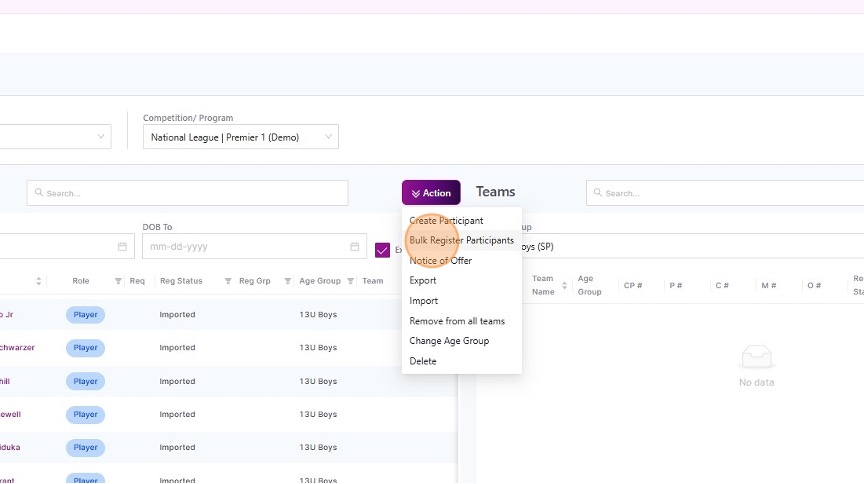
2. Click on Action and select Bulk Register Participants.
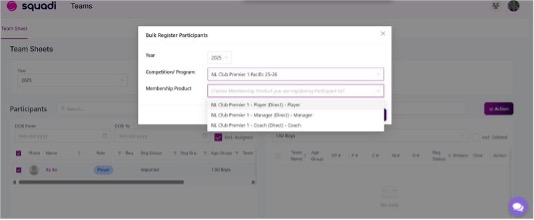
3. Select the Competition/Program that applies, and then select the Membership Product that applies. Please note: the Membership Product is the role with the team, so you will select “Player” when bulk enrolling your players.
4. Add in the players to the correct age group in which you would like to register them.
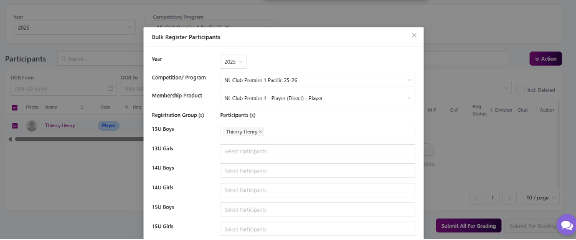
5. When finished adding players, click Next.
6. This will bring up the checkout screen. Simply navigate through the prompts.
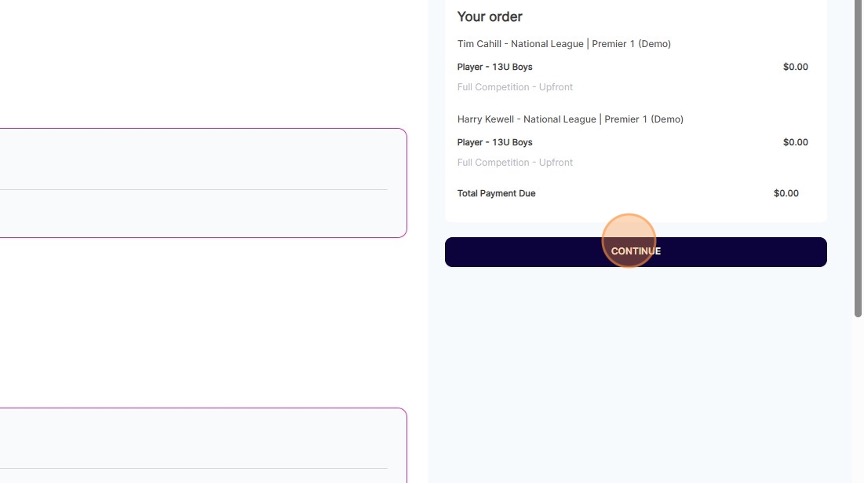
7. Select Submit at the end of the form.

PART 5: UPLOAD PLAYERS’ RISK MANAGEMENT & HEADSHOTS
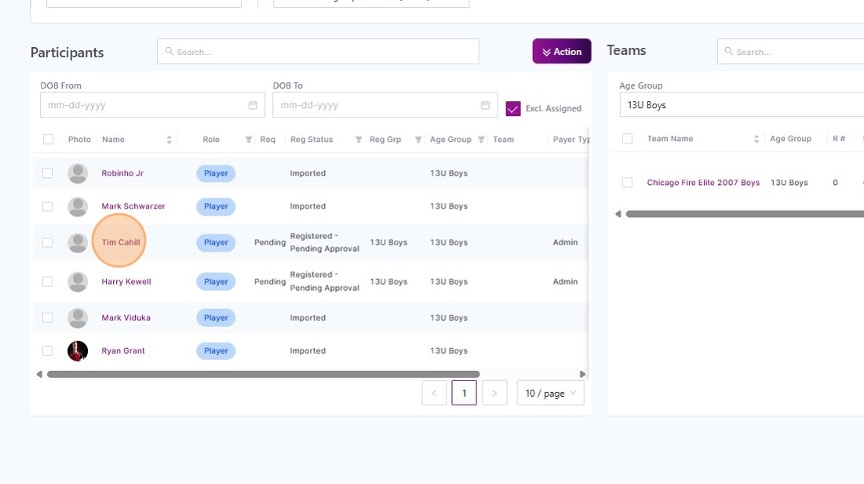
1. Navigate back to the Teams Module to see the status of your players’ registrations.
Please Note: Once you have registered these participants, they will then receive a login email and confirmation that they have been registered. At this point, the end-user (player/parent) will be able to upload their own risk management documents if they wish to do so.
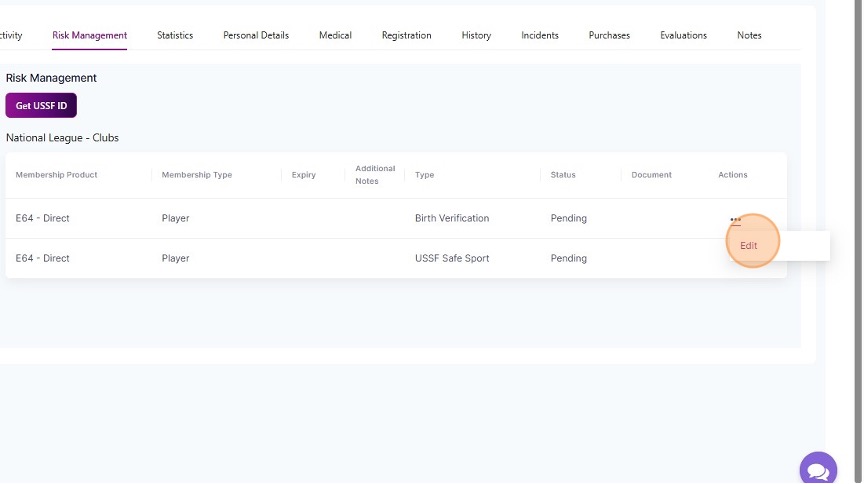
To upload risk management documents on behalf of the players, select the player you would like to add these documents for in the Teams Module as highlighted below:
2. Navigate to the Risk Management tab.
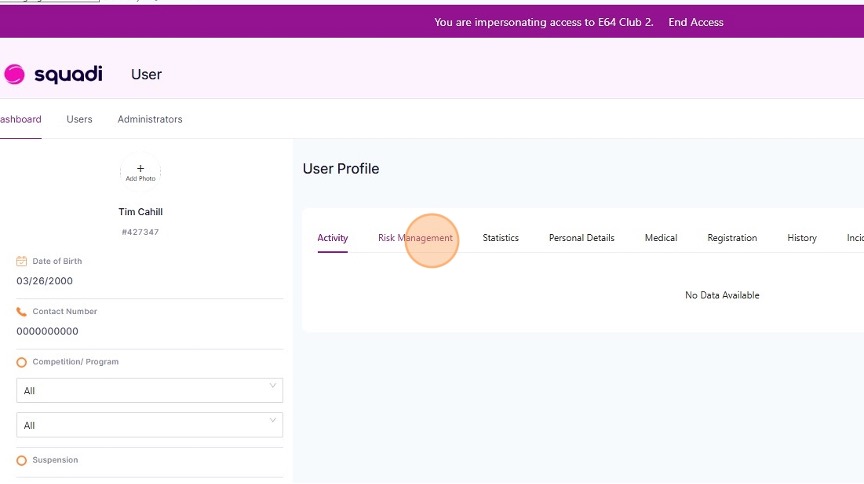
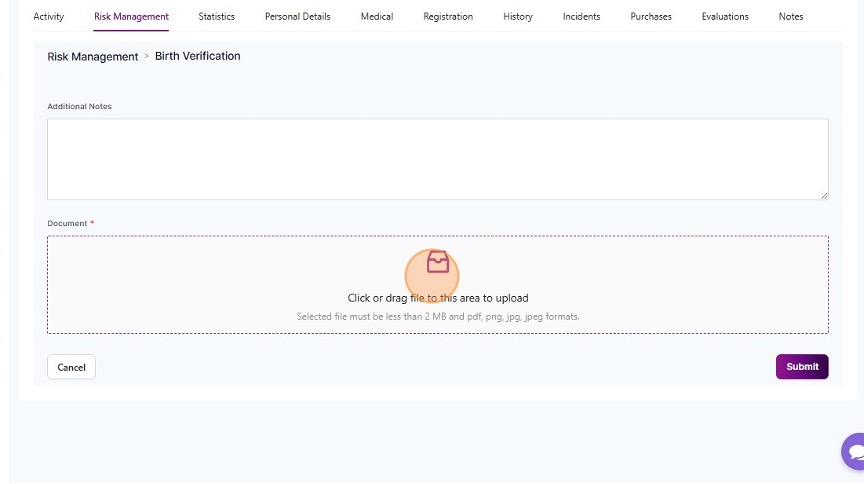
3. Select the document you would like to upload by clicking on the three action dots and selecting Edit.
4. Upload the document and then select Submit.
Repeat these steps for each player on your team.
PART 6: CHECK THE STATUS OF RISK MANAGEMENT DOCS & PARTICIPANT APPROVAL
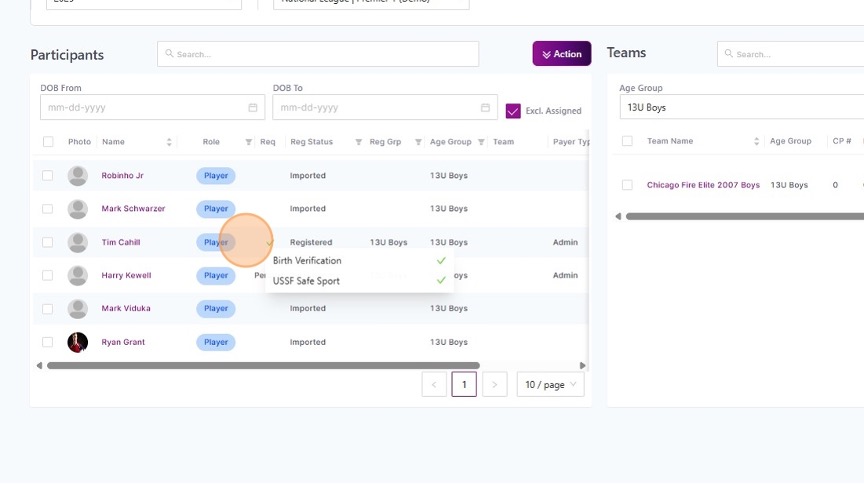
1. Navigate back to the Teams Module and hover over the Requirements (Req) tab.
There are four statuses:
- Pending : No document is uploaded
- : Document is uploaded but has not been approved by the competition administrator.
- : Document is approved.
- : Document has been declined. You or the end-user will need to upload a new document.
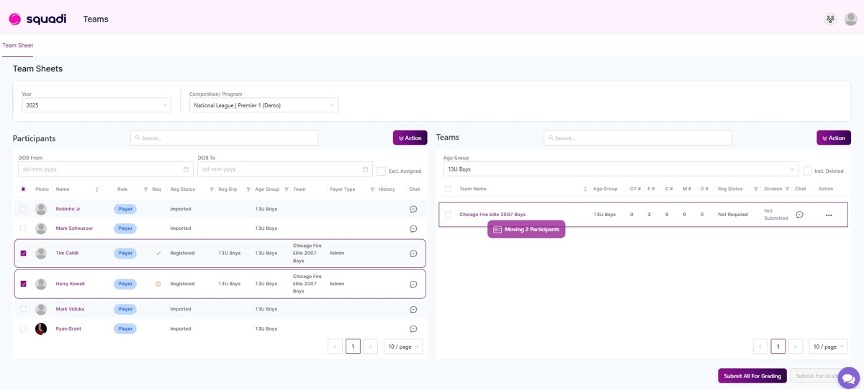
2. Once the participant has been approved, their registration status will change to “Registered.” This will allow you to drag this player successfully into the team and add them to the roster.
PART 7: MOVE PLAYERS INTO YOUR TEAM
1. Select players that are “Registered” and simply drag them across into your team.