Follow the steps below to create your team and add players to your roster for National League club-based competition in Squadi. Click the title of each part to open up the step-by-step guide.
PART 1: HOW TO LOG IN
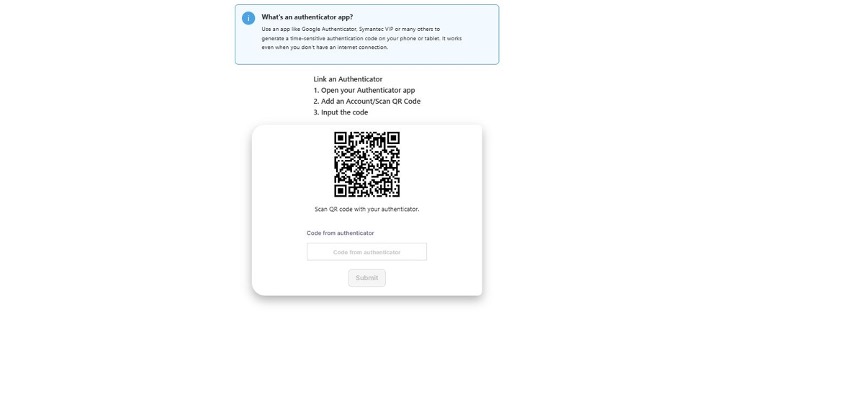
1. Login to your profile via https://admin.us.squadi.com/login and follow the Two-Factor Authentication prompts below (You will need to download an authenticator app if you do not already have one).
PART 2: HOW TO CREATE A TEAM
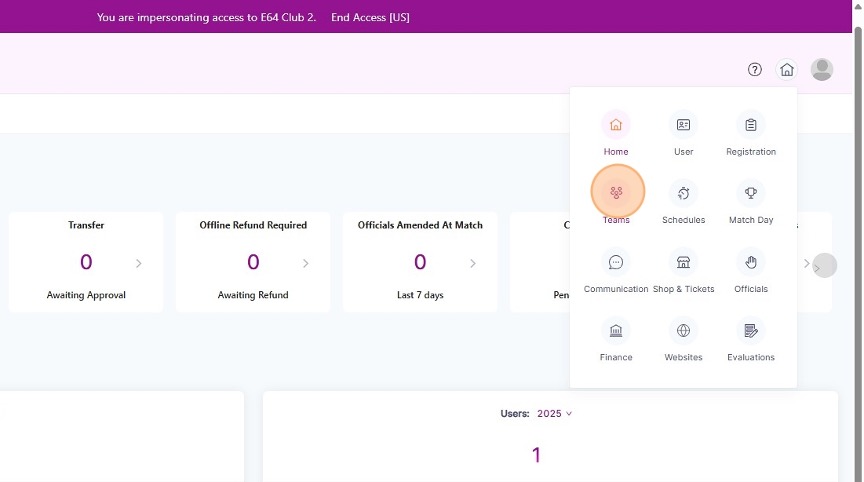
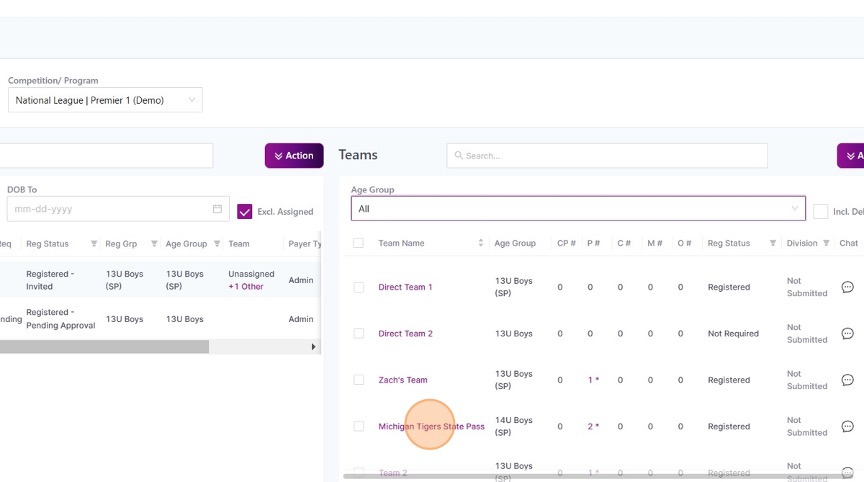
1. Click on the home icon () in the top-right corner of your dashboard, and select the Teams module from the list of options.
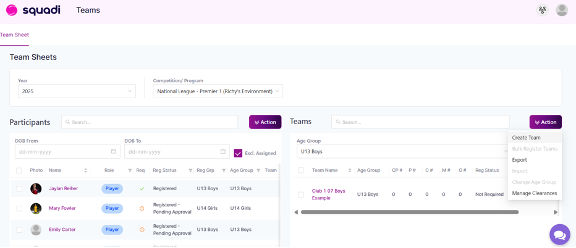
2. Click the action button on the right hand side and select Create Team.
3. Enter in the team name and select the age group. See below for a guide for how to properly name your team.
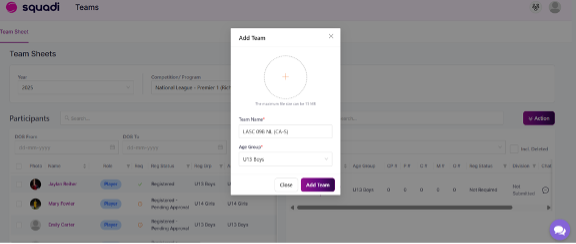
Team Naming Guide
Team names should follow this format: [Club] [Birth Year(s)] [Gender] [Identifier] [NL] [(State Abbreviation)]
Example: City FC 07/08B Green NL (TX-N)
- Birth years – for single year, use two digits (09); for split years, use “##/##” (07/08)
- Gender – attach a capital letter to the end of the birth year; “B” for boys or “G” for girls
- Identifier – optional, if your club specifies teams by color, nickname, coach name, etc.
- NL – the end of the team name must include “NL”
- State abbreviation – put your two-letter state abbreviation in parentheses after your team name
- (CA-N), (CA-S), (NY-E), (NY-W), (PA-E), (PA-W), (TX-N), (TX-S) for states that have two associations
4. Click the “Add Team” button to finish creating your team.
PART 3: HOW TO ADD YOUR PLAYERS
To add your players, you can either import all players at once using a spreadsheet or you can manually create each individual player directly in Squadi. Both options are outlined below.
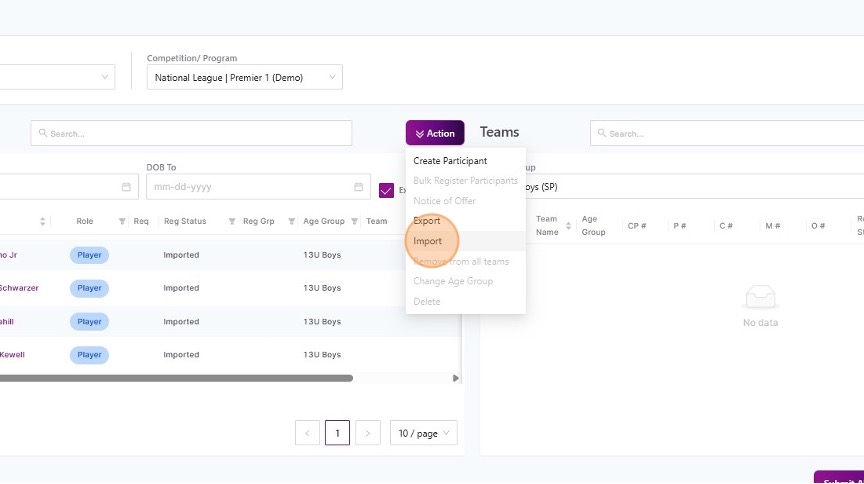
OPTION 1 – IMPORT ALL PLAYERS AT ONCE
To import your players, click the Action option and then select Import. To download and fill out the spreadsheet you must use for the import, click the download button below.
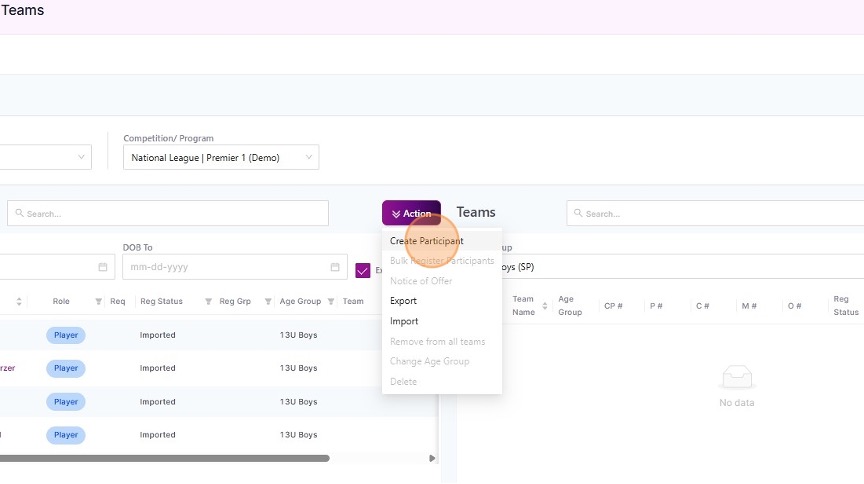
OPTION 2 – MANUALLY CREATE INDIVIDUAL PLAYERS
To manually create individual players, click the Action option and then select Create Participant.
Fill out the participant details. When finished, click Add Participant.
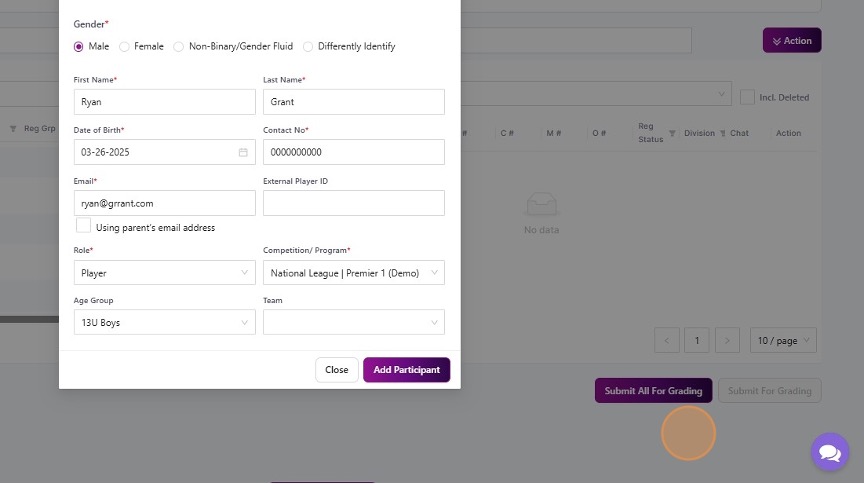
Repeat the above steps to add each player on your team.
PART 4: BULK REGISTER YOUR PARTICIPANTS
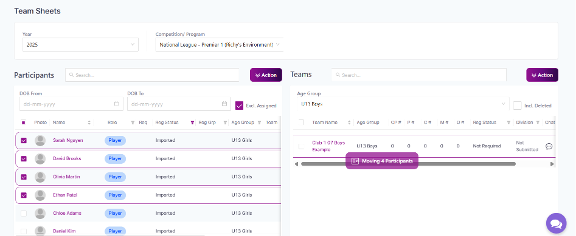
1. Drag your players across to the team.
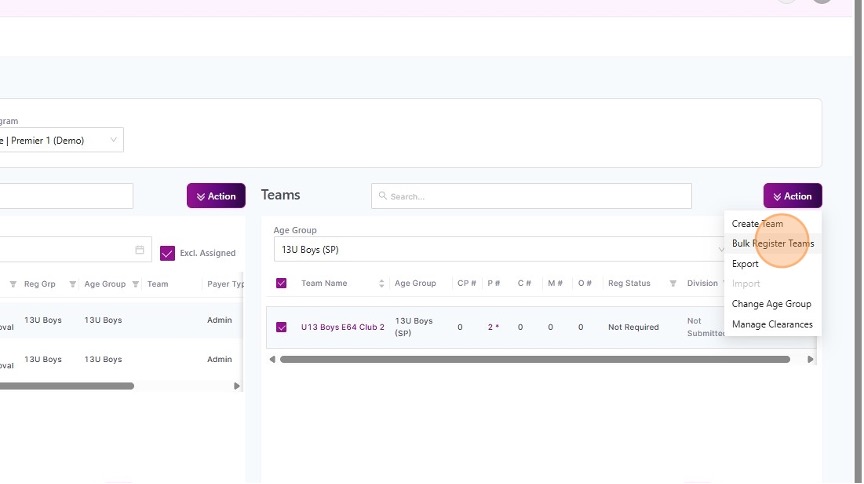
2. Select the checkbox of the teams you would like to register. Then, click Action on the right-hand side and select Bulk Register Teams.
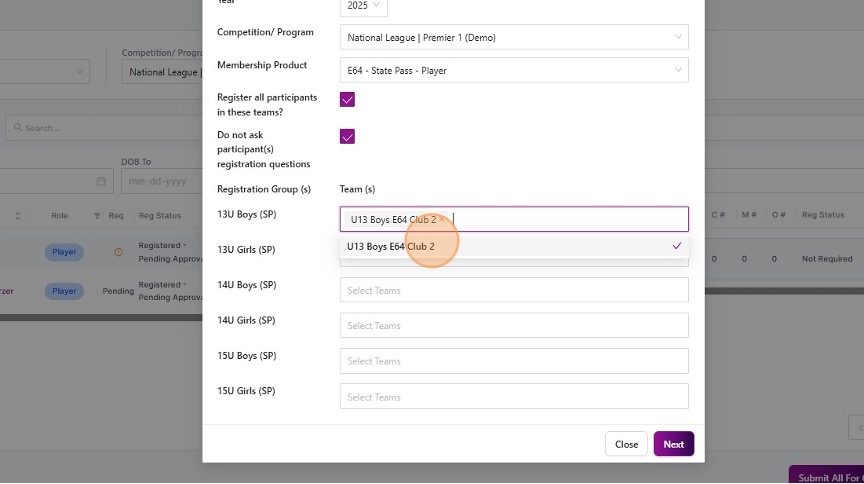
3. Select the competition that applies and then select the NL Club Premier 1 – Player (State) – Player option.
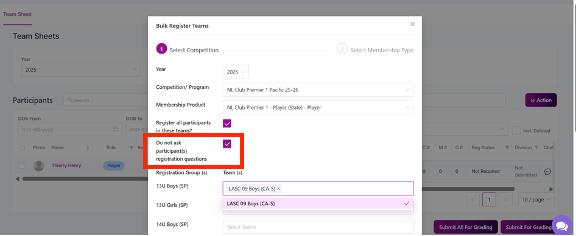
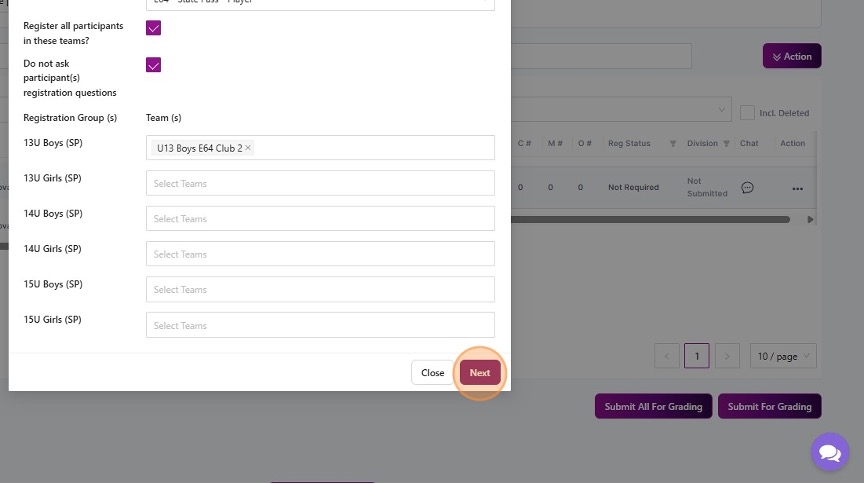
4. NOTE: This is an important step. Select the checkbox for “Do not ask participants Registration Questions.” (See red box in the above screenshot)
5. Assign the teams to the correct age groups.
6. Select Next.
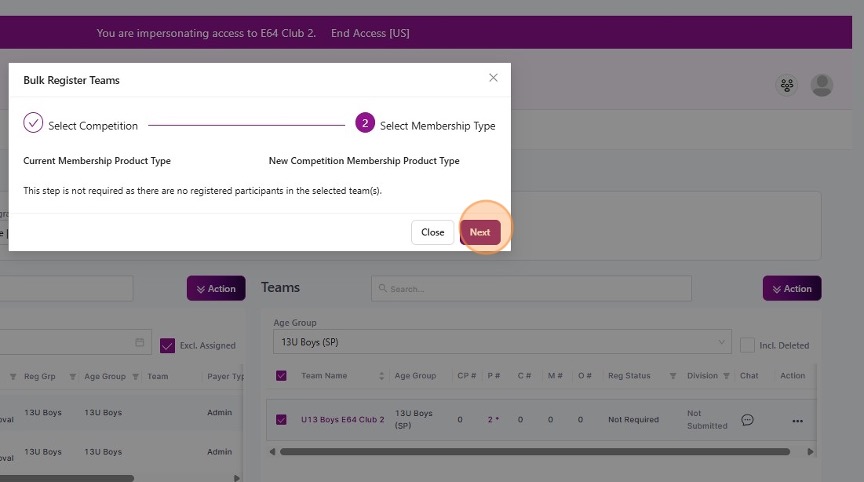
7. Select Next.
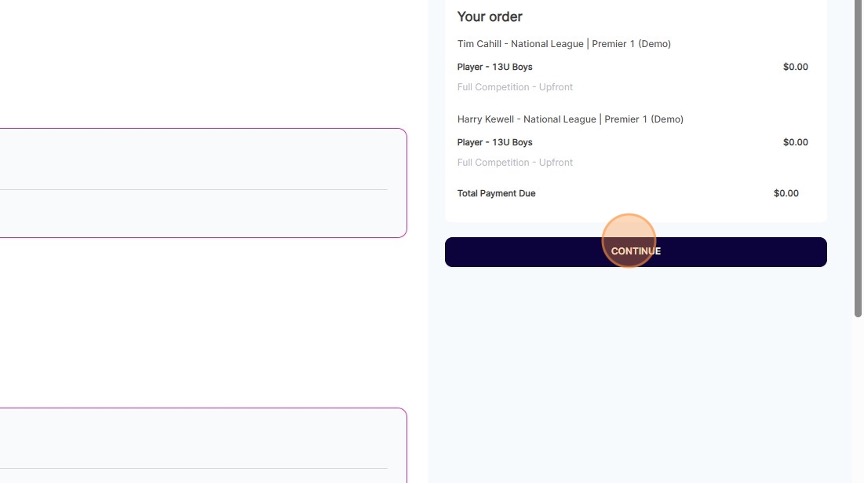
8. A new browser should open. Click Continue.
9. Select Submit at the end of the form.

PART 5: HOW TO CHECK THE APPROVAL STATUS OF YOUR ROSTER
1. Navigate back to the Teams Module.
Note: The Registration Status for your team show now be “Registered.”
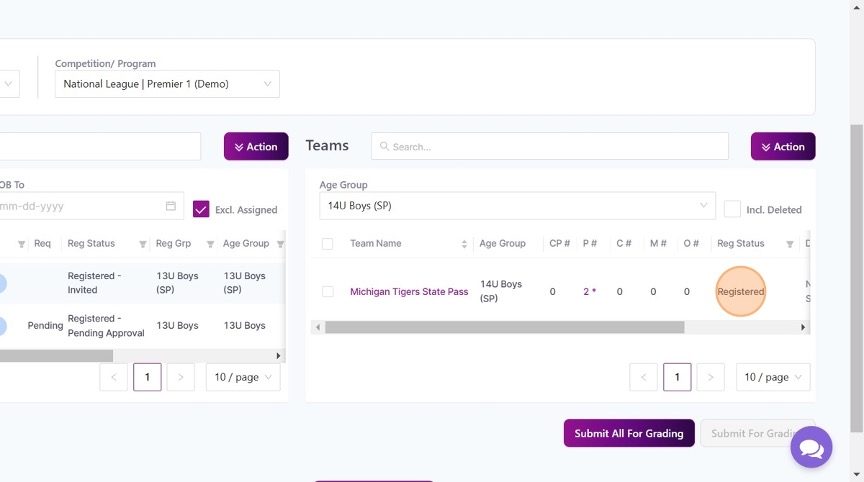
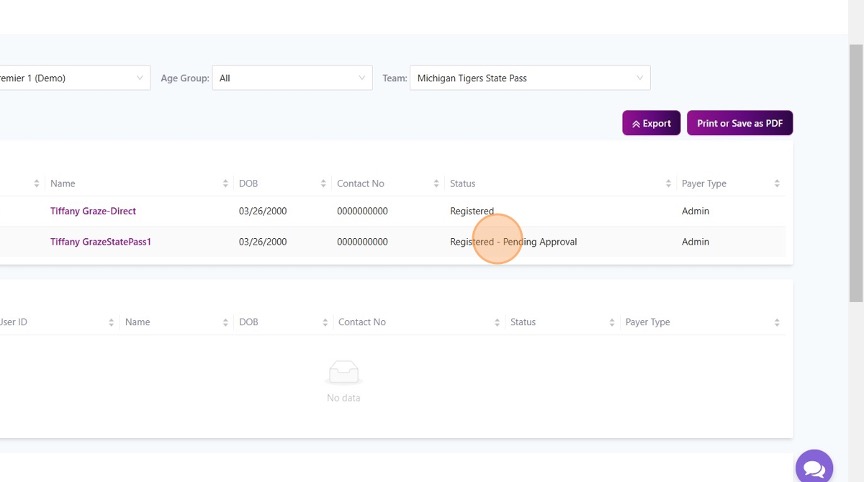
2. Check the status of your participants approvals by selecting the Team Name.
3. Here, you should see the status of your participants’ approvals.
Registered = Participant has been approved
Registered – Pending Approval = Participant has not been approved yet